 Light painting: ISO 100, 18mm, f/3.5, 15 sec
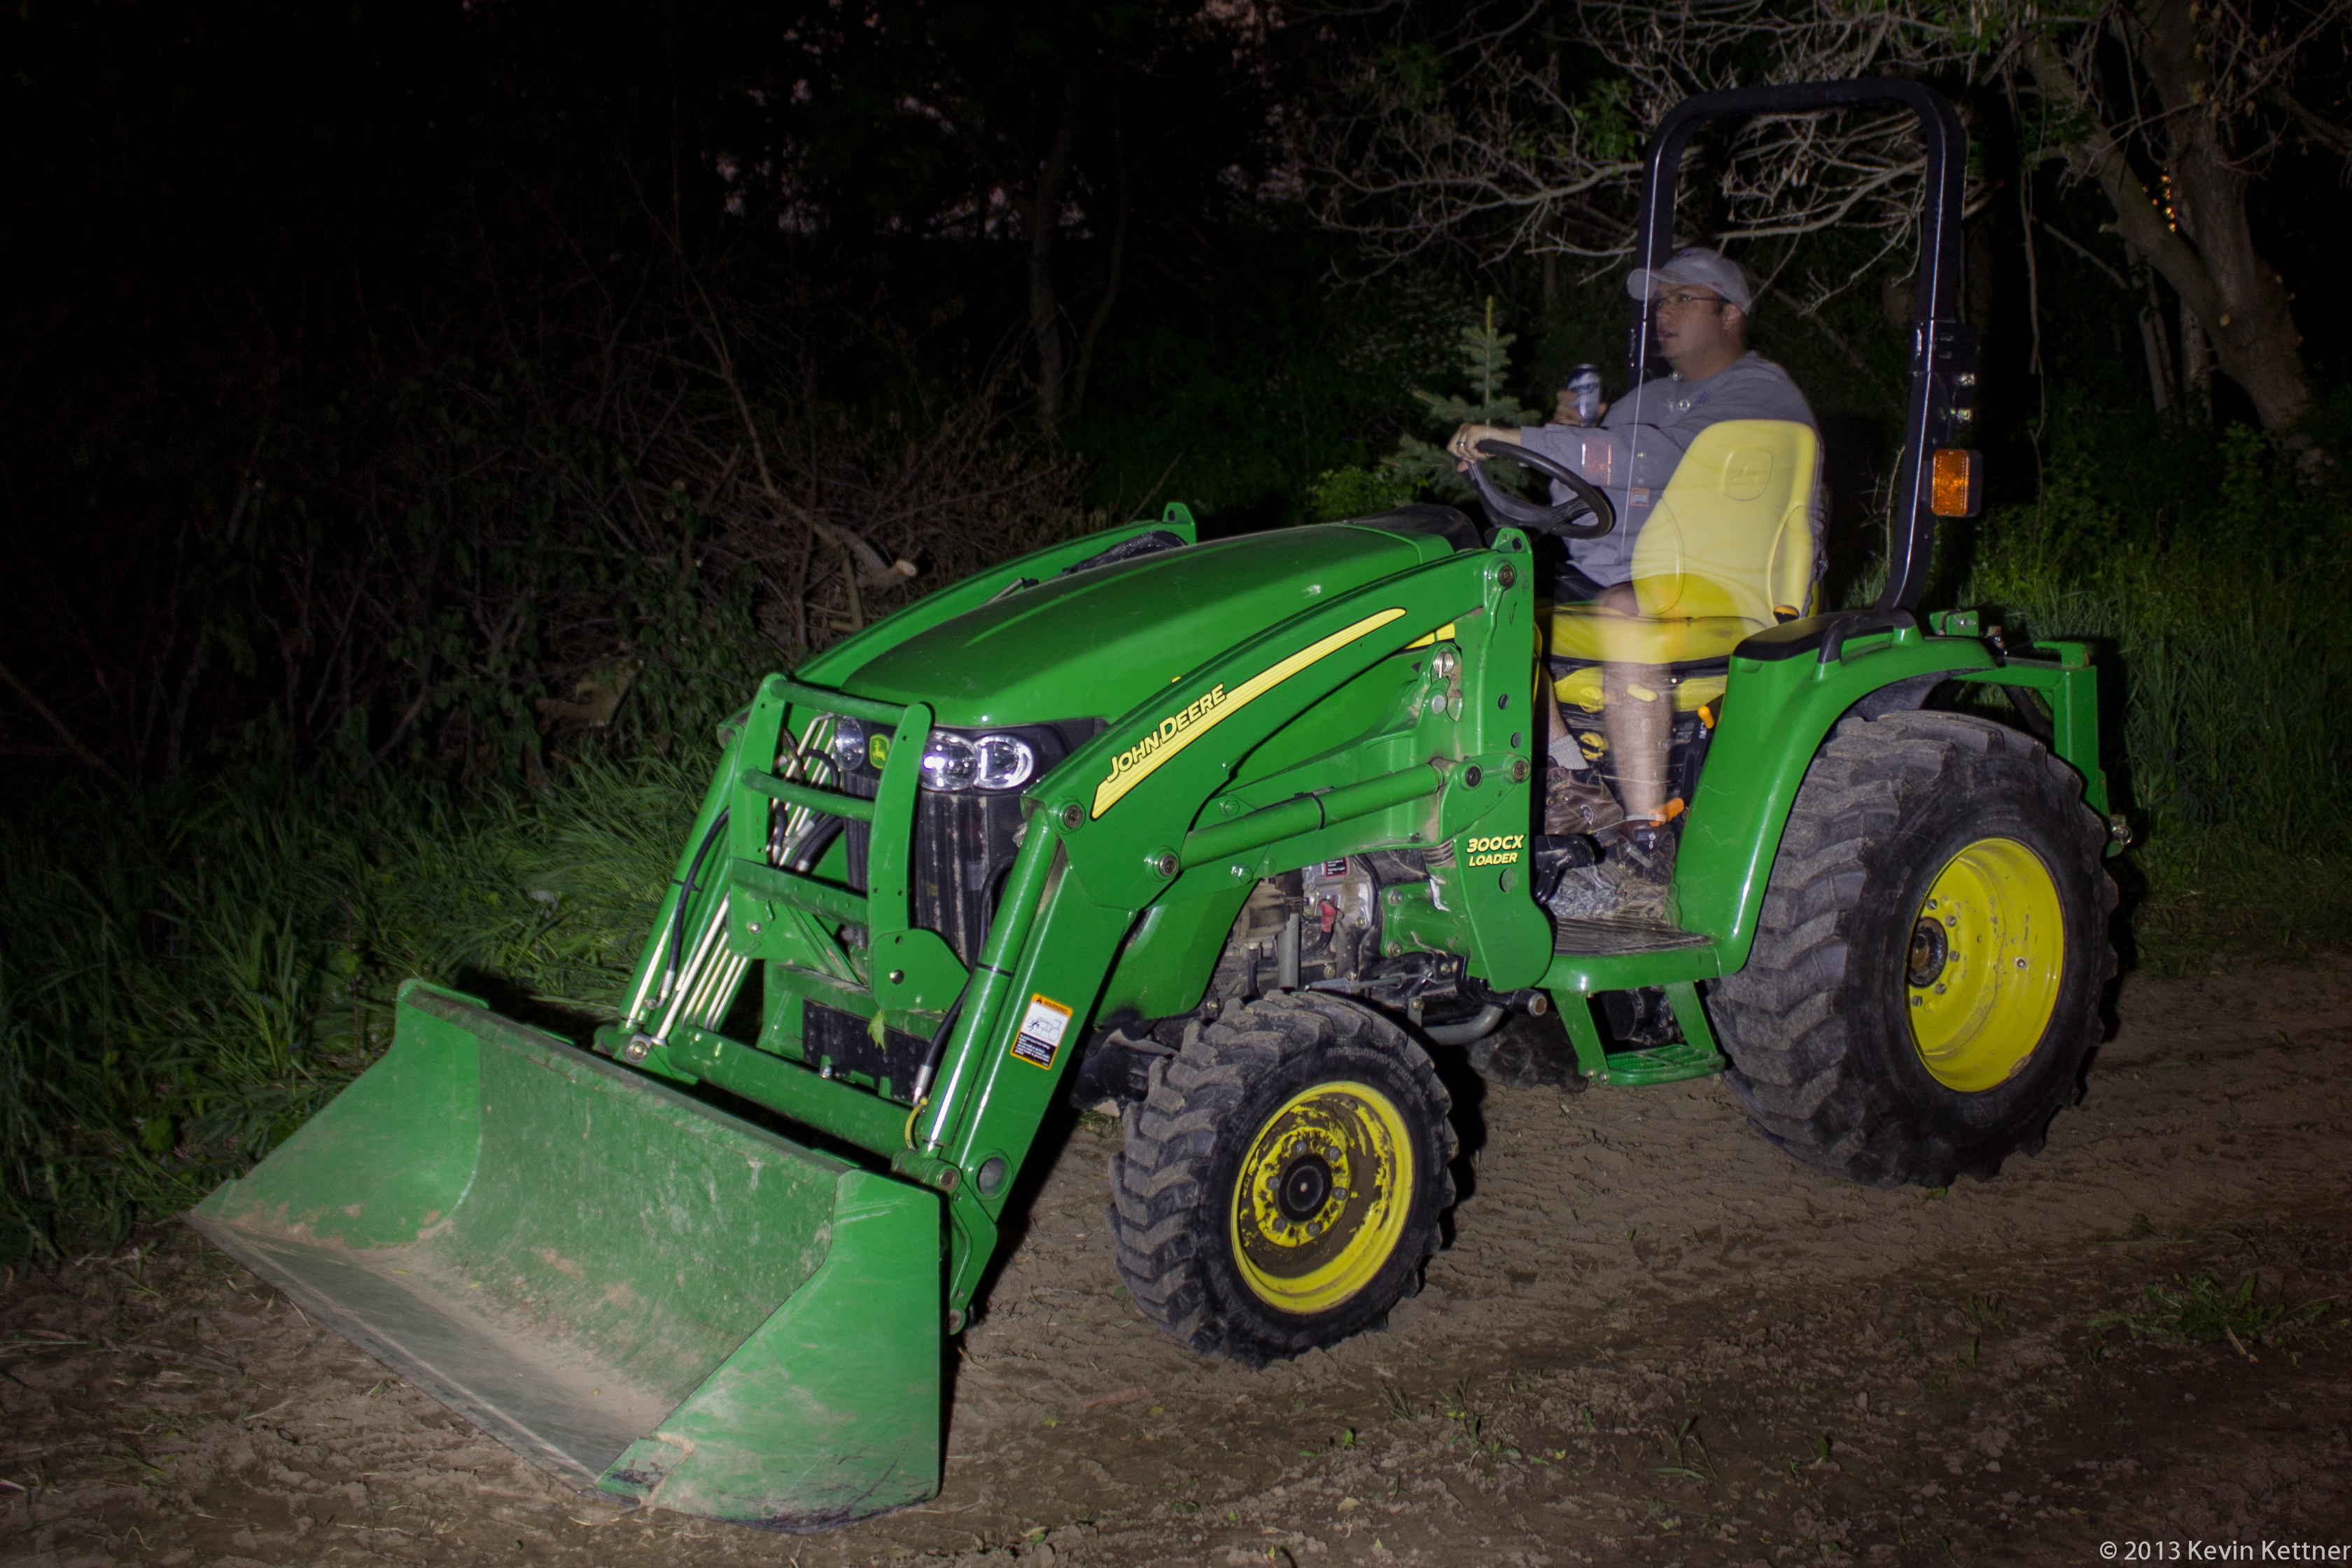
Here’s how to create your own ghost images:
- First you need a darkish night, a tripod, a camera with a manual mode for long exposures, a good, bright flashlight and optionally a remote trigger. For the flashlight, you’ll want something like one of the Cree LED flashlights with a momentary switch. The one I used was like 200 lumen.
- Frame the shot with the camera and tripod.
- Camera settings
- Set the camera to manual mode and disable the flash and autofocus.
- Set the ISO at the lowest setting, like ISO 100, so that it doesn’t over expose.
- Set the focus. I will sometimes take a test shot with the camera on automatic using the built-in flash so the camera uses the autofocus, then turn off the flash and autofocus and you’re set.
- Use a long enough exposure to accomplish what you need to the next steps, like 15-30 seconds. You can go longer using the bulb mode, but you’ll want to have a remote release so you don’t have to hold the shutter button down with your finger, which can cause the camera to jiggle.
- Click the shutter release.
- Paint everything you want to show up in the photo with the flashlight. The longer you shine your flashlight the brighter objects will show up in the photo.
- Turn off the flashlight.
- Have someone get in the picture.
- Have them hold very still while you “paint” them very lightly and then turn off your flashlight.
- The shutter will close and you’re done.
If you did everything right, your “ghost” will look transparent compared to the rest of the image.